Convert files to PDF documents
With Right PDF Server Client, you can create PDFs from a variety of supported file types. This is especially useful when converting a large number of files to PDFs. To check which file types are supported, see the list in the Right PDF Server Console window installed on the server machine.
Before starting file conversion, make sure (1) Server Console is activated and (2) your client PC was connected to the Server (see Connect to server). For other conversion methods and profile settings on Client, see Client conversion settings.
You can convert files to PDF, merge multiple files in the form of combining or overlaying, or package multiple files into one PDF portfolio.
Create a single PDF document
You can create separate PDF files for each source file.
-
In the Right PDF Server Client dialog box, add files to the file list. Click Add and select Open files… or Open from DMS… from the menu. Or you can directly click and drag files to the queue.
-
As needed, do the following actions to delete, remove all, and/or arrange the order of selected files:
-
-
Delete: Remove the selected files from the file list. Click on one file or hold down Ctrl to select multiple files and then click Delete to delete them all.
-
Up/Down: Rearrange the file order in the list. Click on one or hold down Ctrl to select multiple files and then use Up or Down to move them forward or backward.
-
Clear: Remove all files from the list.
-
Select Convert one file to a PDF document in the selection box.
-
Choose a conversion profile and set up destination settings as needed.
-
Click the Convert button .
.
-
Decide a location to save the resulting PDF file, name it and click Save.
Combine multiple files into one PDF
Right PDF enables combining multiple source files from a variety of file types into one PDF document, with page order mirroring the order the files are placed in the file list in the Client window. This method is possible only when there is more than one file in the file list of PDF Client. The difference between combining and packaging is the former connects each file by page to create a large document, whereas packaging keeps each file independent of each other. See Package files into a PDF portfolio.
-
In the Right PDF Server Client dialog box, add at least two files to the file list. Click Add and select Open files… or Open from DMS… from the menu. Or you can directly click and drag files to the queue.
-
Arrange the files in the desired order using the Up and Down buttons.
-
Select Combine files into one PDF document in the selection box.
-
Adjust profiles and save settings as needed.
-
Click the Convert button . You will get a prompt stating you cannot perform combining on a single file.
-
Name the file and select a location to save it. Click Save.
Package files into a PDF portfolio
This method converts files to PDF and packages them into a PDF portfolio. It is different from Combining, which merges multiple documents into one.
-
In the Right PDF Server Client dialog box, add at least two files to the file list that you would like to package. Click Add and select Open files… or Open from DMS… from the menu, or you can directly click and drag files to the queue.
-
Arrange the files in a desired order using the Up and Down buttons.
-
Select Package files into one PDF document in the selection box.
-
Click Option to open the Cover Sheet dialog box. You must set a Cover Sheet for your package. This is the page readers will see when they first open the document:
-
Adjust conversion profiles and destination settings as needed.
-
Click the Convert button to start conversion. If there is only one file in the list, a prompt pops up stating that you cannot perform Packaging on just a single file.
-
Name the file and select a location to save it. Click Save.
Overlay files as one PDF document
This feature overlays contents of two or more files as one PDF document. For instance, through overlaying a logo image and a document, the logo will be placed in the specified position on every page of the output PDF document. Overlaying files is only possible if you have more than one file in the file list of PDF Client. Please see examples below:
Example 1
Here you can see an example of making a cover page:

-
In the Right PDF Server Client dialog box, click Add and select Open file… or Open form DMS… from the menu. Locate and select files to be converted and overlaid as one PDF file. Or you can directly click and drag files to the queue. You need a single-page file containing the picture elements (A) for the cover and a multi-page file in which the first page contains cover page text (B).
-
Select Overlay files into one PDF document in the selection box.
-
To place the selected image in a desired position, click Option. Make sure Page Center is selected and the checkbox Repeat the last page of the shortest document for page overlay Click OK.
-
Adjust profiles and save settings as needed.
-
Click the Convert button . Select a location to save and click Save. If there is only one file in the list, you will get a prompt stating that you cannot perform Overlaying on a single file.
You can get the same result by overlaying three files if you have the two picture elements in two separate files. The picture elements should be placed in the source file in the position where they should appear in the resulting PDF.
Example 2
To put a logo on every page of a document:
-
In the Right PDF Server Client dialog box, click Add and select Open file… or Open form DMS… from the menu. Locate and select files to be converted and overlaid as one PDF file. Or you can directly click and drag files to the queue. You need an image or other file containing a logo.
-
Select Overlay files into one PDF document in the selection box.
-
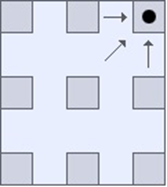
Click Option and select a desired location (e.g. top-right corner)
-
Select the checkbox Repeat the last page of the shortest document for page overlay.
-
All pages get the logo in their top-right corner.


